Refurbishing the Espresso Machine (in pursuit of coffee)
September 11, 2020
The heating element on my Rancilio Silvia finally died for real, after faking it a couple times previously. One day the machine was happily cranking out shots of espresso, and the next day I flipped the power switch and the GFCI breaker immediately tripped. Arrgh, I need coffee! Fortunately I have one or two (OK, six actually) backup ways to make coffee, but dangit it’s just not the same.
The last time this happened was several years ago, and it resolved itself before I had to do anything drastic, but I suspected that the story wasn’t over and it was just a matter of time. I’m rather surprised, actually, that it lasted so long before finally giving up the ghost.
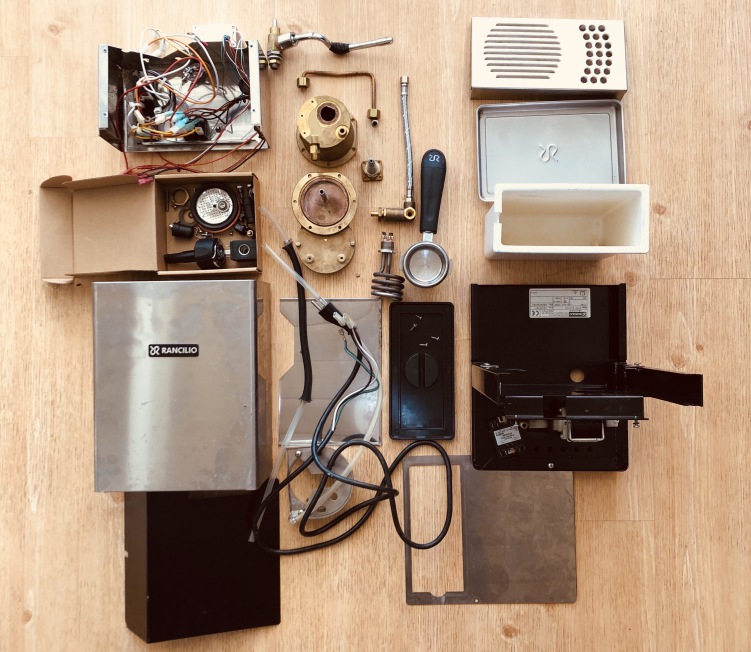
Fortunately, parts for my machine are readily available. That’s one of the reasons I bought it originally – it’s not a disposable appliance, destined for the landfill or (at best) some combination of metal scrap and e-waste recycling the first time it stops working. In addition to being of simple construction and robust build, it’s fully serviceable by anyone with a bit of electrical and mechanical competence. Heck, it doesn’t even have any of those stupid warranty-void-if-seal-is-broken stickers!
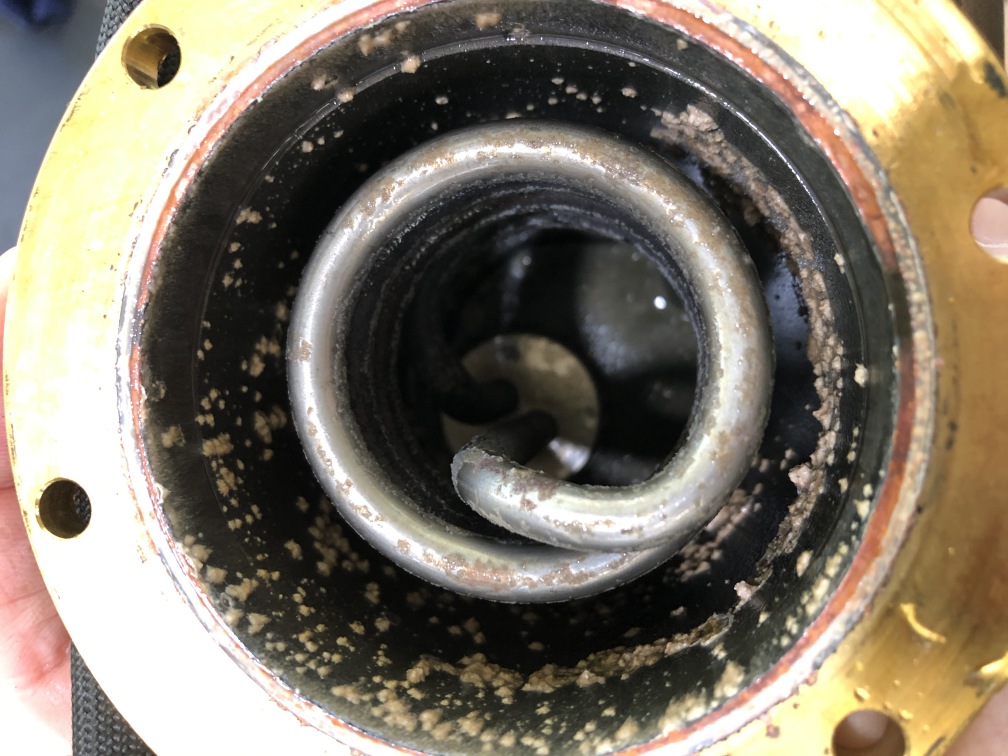
I opened it up and measured the resistance of the heating element (good), and checked for continuity between the element and the boiler (bad). Somewhere inside the element there’s a short; nothing to be done but order a new one, along with the various seals and washers needed to put it all back together again properly. There’s an o-ring at the base of the boiler that probably would be fine, but I didn’t entirely trust it, and it is a pain to get to if it’s bad, so I figured it’s cheap insurance to replace it when I have everything apart. There are a couple of one-time-use copper crush washers in the plumbing to the boiler, and a seal under the heating element, and a couple little o-rings in the solenoid valve, that I ordered too.
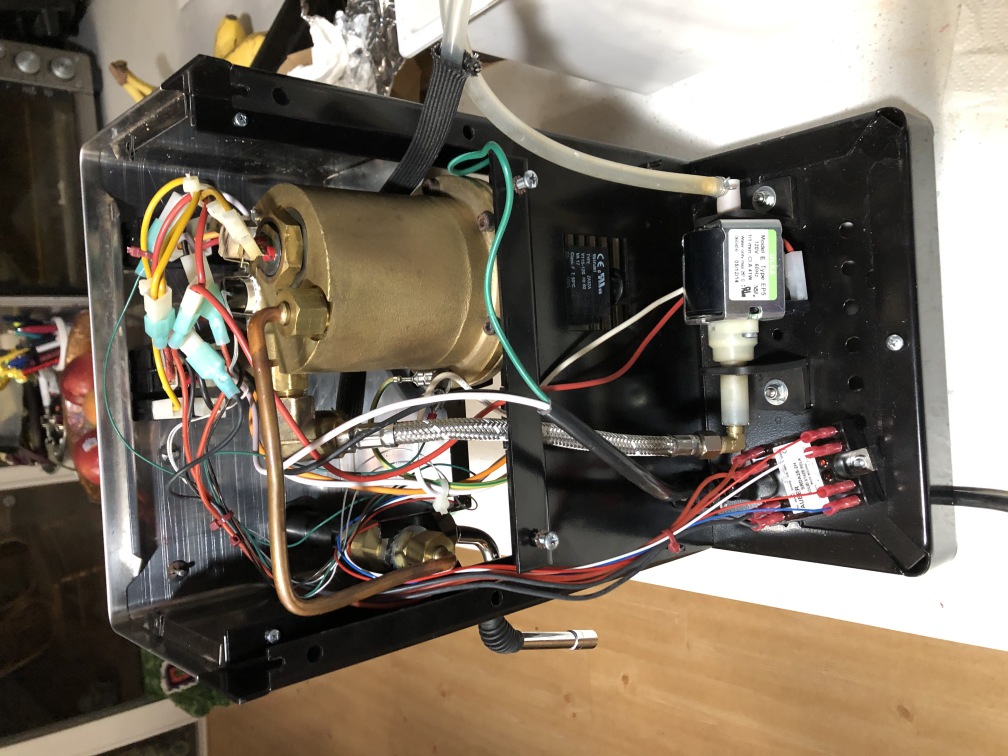
Once I had the parts in hand, I had to disassemble nearly every part of the machine to gain access to the base of the boiler. The entire upper portion of the boiler has to come off, to get the heating element out. This is better than the older models, though, in which the heating element was permanently attached to the boiler; if you burned out an element, you got to replace the big brass tank too.
With the boiler apart, I realized that there was quite a bit of calcium scale built up. I did de-scale the machine from time to time, but apparently I could have done so more… so I took all the plumbing completely apart, and soaked it all in de-scaling solution. This stuff is basically a mild acid; vinegar works almost as well, but I had a big jar of tablets so it was easy to mix up lots of the stuff. It took a few cycles in the acid bath to really get all of the encrustation dissolved, but it worked well.
With all the parts off, I could see the painted steel chassis had a couple of rust spots. I sanded them out to bare metal, then primed with Rust-Oleum “rusty metal” primer and Gloss Black topcoat. These were the good brush-on paints, that go on thick and really protect the metal, rather than the thin spray can stuff. The gloss black is a good match to the original paint, but I bet my primer is better.

All the parts went back on just fine, and Silvia’s back to making coffee even better than before!