Sprinter Repairs
December 9, 2020
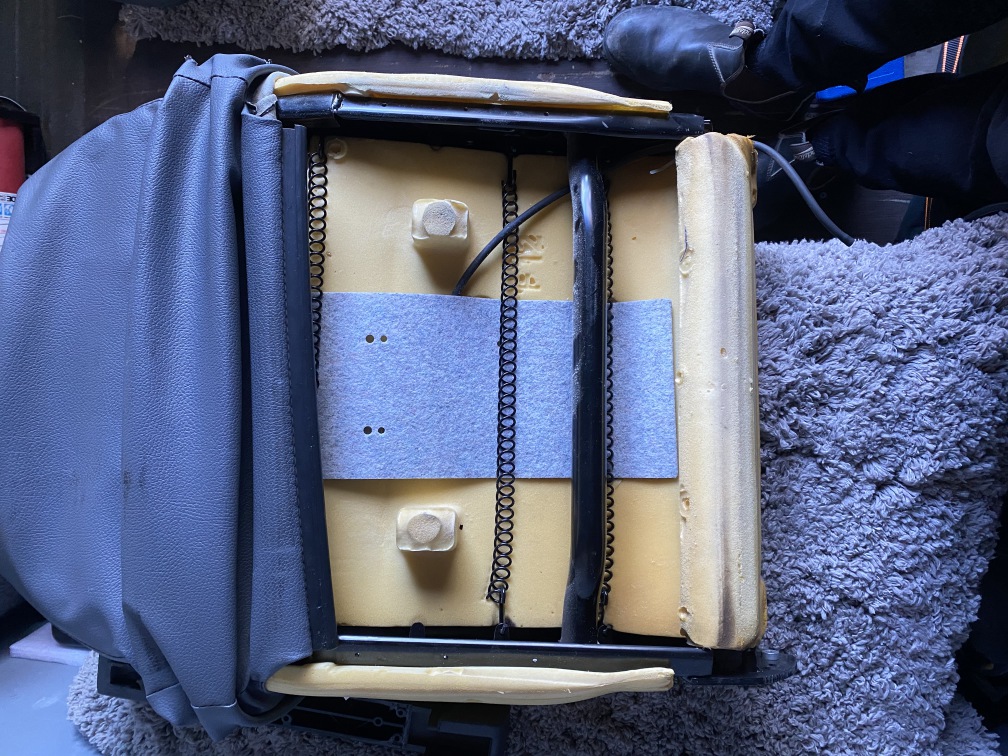
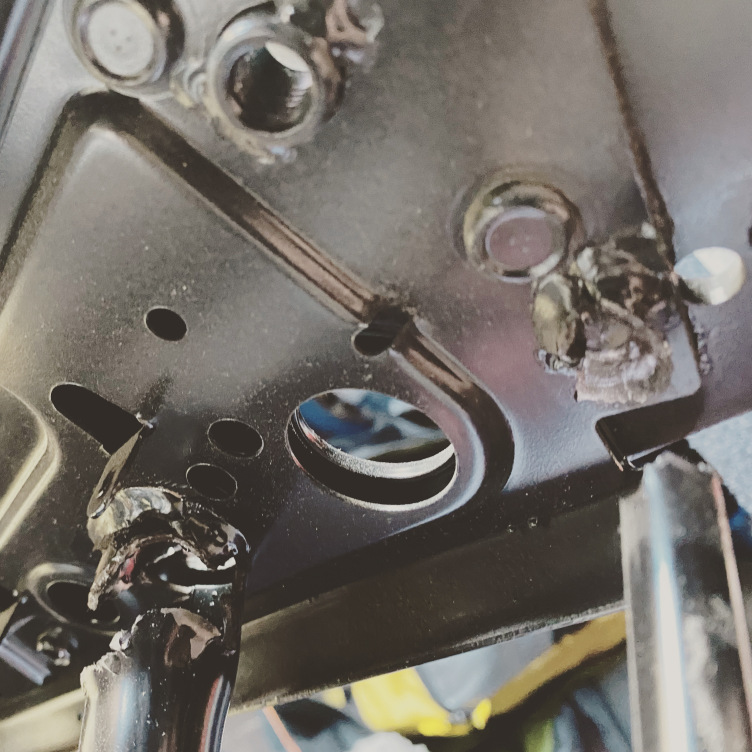
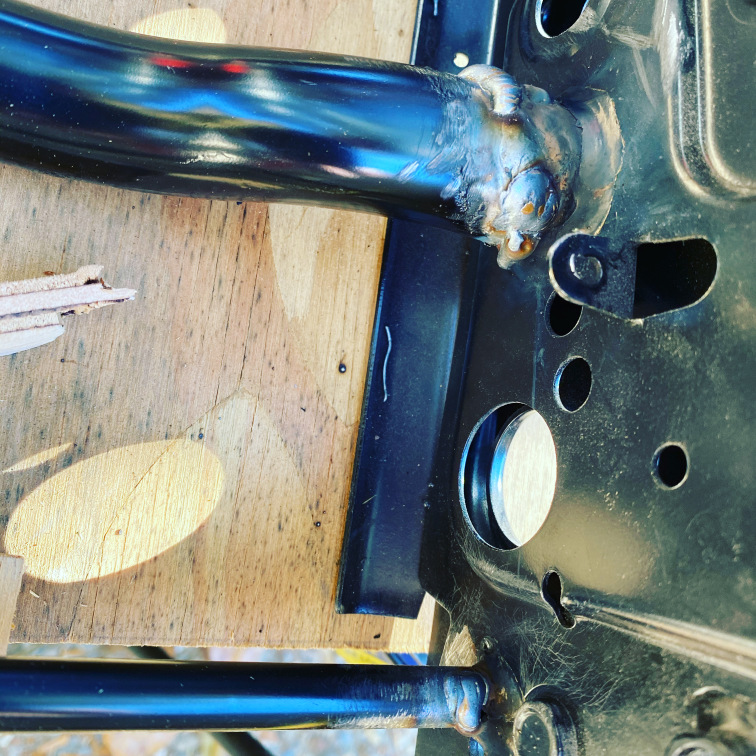
Our new-old vehicle always has something to attend to but that’s to be expected with a 13-year old van with 235,000 miles on the odometer… A recent trip revealed that the driver’s seat needed attention. I discovered earlier that the back of the seat was “floppy”; the right side could be moved fore-and-aft in a way the neither the left side, nor any part of the passenger seat, could be moved. It wasn’t immediately obvious what the source of this floppiness was, though, and driving around town it really wasn’t a problem. On a longer trip though, as I discovered, the difference in support between the left side and the right led to my back and neck and shoulders starting to lock up – thus, the seat must be fixed! Getting the seat back out was easy, and somewhat to my surprise the seat cover came off without too much trouble, revealing the steel frame underneath. The problem was evident: at some point, something had crashed into the seat with considerable force, enough to rip the two cross-tubes apart.
The van has no evidence of having been in an accident, but it was used as a commercial vehicle before it came to us, and it looks like some heavy cargo shifted (or perhaps an overzealous forklift driver shoved a pallet in there good and tight?) and caved in the metal partition that used to separate the front from the cargo area. So my guess is that the seat damage came about at the same time.
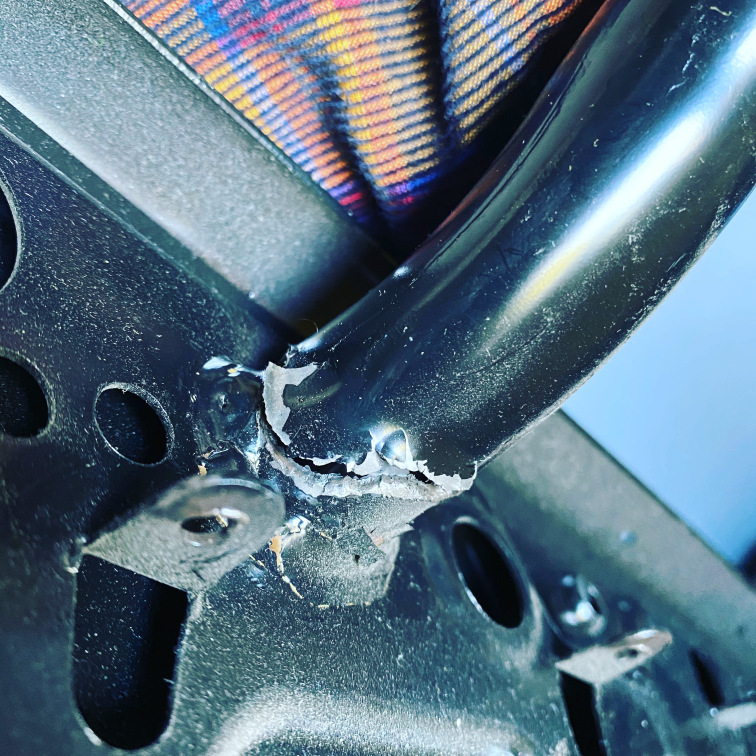
Fortunately, there wasn’t any other damage to the seat frame, and… I have a welder. Easy fix. Sanded the paint off the damaged areas as best I could, clamped the frame down flat, and filled in the broken bits with glowing hot metal. Some primer, some paint, good as new!
Next on the list was the blower fan motor. It was intermittent on our trip, and fortunately the mild conditions meant it wasn’t really a problem; thank goodness the humidity was so low that we never needed to defog the windshield! I had tried to diagnose it on the road, and felt pretty sure that the problem lay in the electrical connector to the motor. If I wiggled it, the motor would run (or run faster) for a few minutes, but would eventually revert to non-functioning. But when it worked - the motor worked just fine. So, I built a new wiring harness for it that used standard 1/4 inch spade connectors, cut off the old one, and spliced the new one in. I did a really nice job of it, and was quite pleased with the result – until I turned on the motor, and got exactly the same behavior I had previously! Doh. Pulling the motor out (again) and extracting the actual motor from the plastic fan housing led to what I should have checked for originally: the motor brushes were absolutely worn out. That doesn’t entirely explain why I was getting the change in behavior when pressing on the connector in various ways, but it was certainly enough to warrant ordering a new motor! I thought about just replacing the brushes, but it’s still a 13-year-old motor and the bearings are likely marginal too. I ordered brushes anyway, and will eventually swap them in the old motor, and put it on the shelf as a spare. So, skip forward a week, and the new motor arrives; ten minutes and it’s installed and WHOOOSH wow what a difference!
The sun visors were also on the list, and the new ones arrived in the same box as the blower motor. The old ones were coming apart, the foam inside was aging out. You’d think a piece of foam and plastic would not be expensive, but remember these are Mercedes-Benz sun visors and their superiority must be justified with a commensurate price. But we do now have two brand-spanking-new pieces of foam and plastic to keep the sun out of our eyes.
Also in the box-o-parts were new mud flaps (AKA splash guards), also expensively made in the hallowed halls of Daimler. The old ones, or three of them anyway, had worn out and fallen off, except for vestigial strips. The fourth one (driver’s side in the front) was miraculously intact; who can say why. With winter here, maybe someday precipitation will again fall and we will want to journey to the mountains to ski. The Sprinter sits pretty high off the road, and without mud flaps I fear for anyone following us (and, the front ones look like they’ll do a good job of keeping the worst of the road sand off the side of the van.)
Lastly, just arrived today, is a new electric coolant pump. One of the Sprinter’s many quirks, at least compared to vehicles I’ve worked on before, is that it has not only a mechanical pump driven by the engine, but also this electric one. Apparently, it helps with the coolant flow when the engine is running slowly, e.g. putting around town, and also helps out with the heater when the engine is off. I’ve heard it run, but never for long and not reliably, and now not at all. Considering it’s age, and that it basically runs whenever the engine does, I’m sure the brushes are as worn out as the blower fan motor’s were. We’ll find out this weekend when I swap the pump out!
With the electric pump working, I can then dive in to figuring out what’s up with the auxiliary heater. We have this little box, about bread-loaf size, that lives just behind the left headlamp. When it runs, it sips diesel fuel and burns it to heat the engine coolant. That both warms up the engine (for those frigid northern European winters) and boosts the heat available to the occupants. However, it’s dependent on the electric coolant pump.